How to create a server on Zampto Hosting
To create a server on hosting.zampto.net (Zampto Hosting), follow these steps:
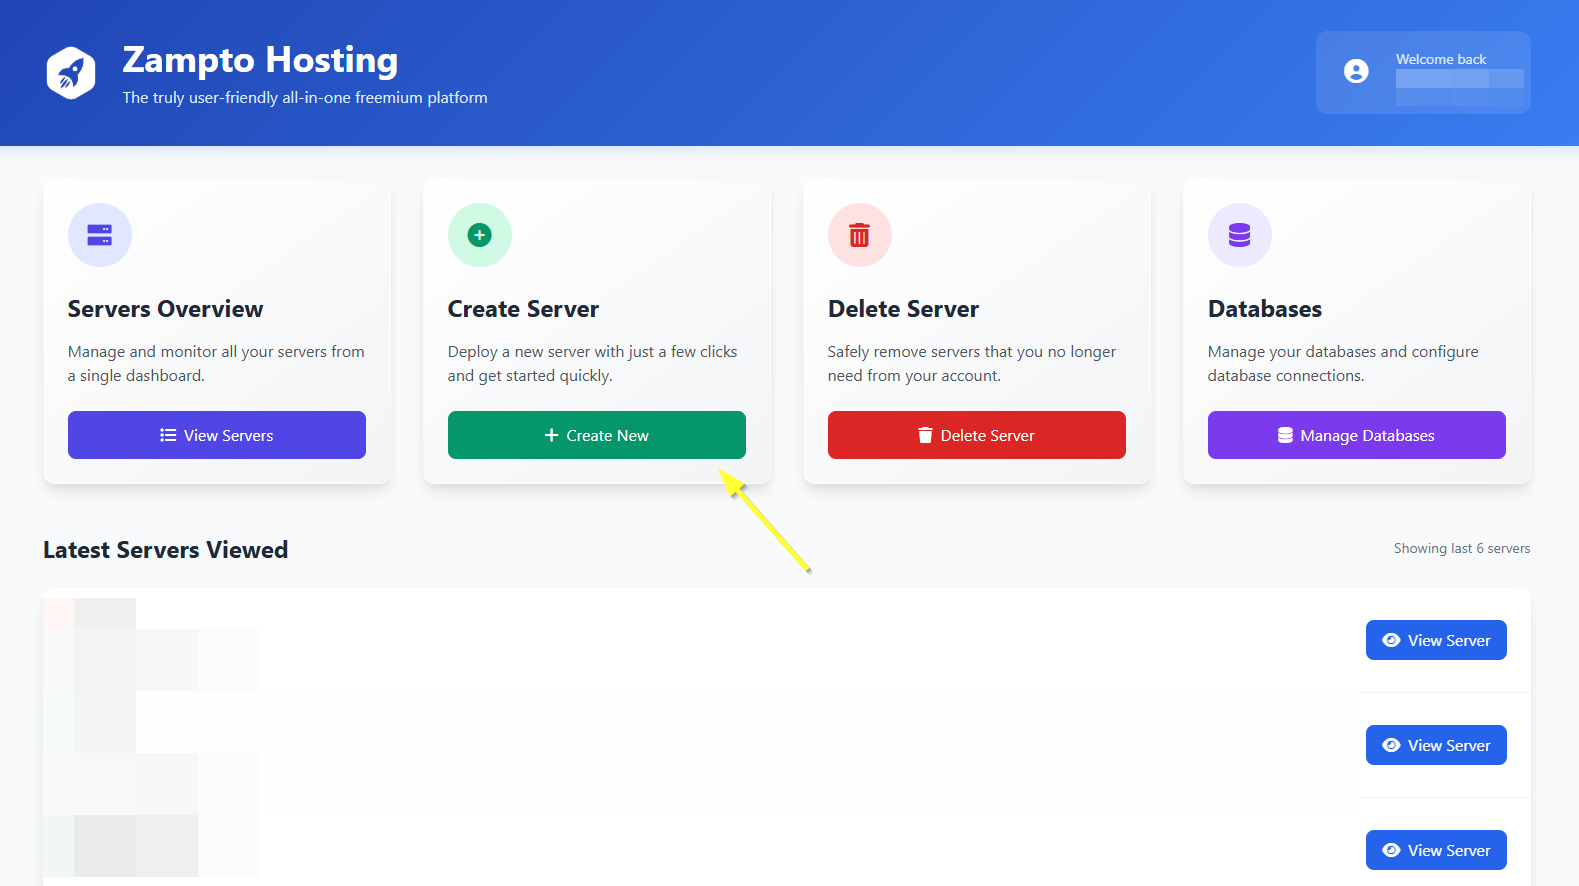
- On the homepage (after logging in), click the "Create Server" button.
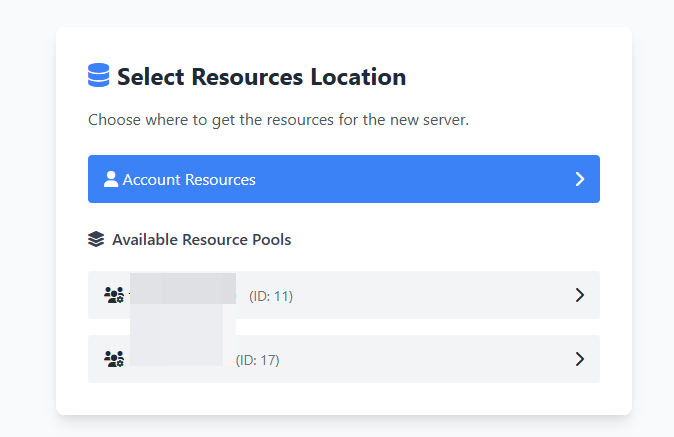
- Then, select the location of the resources to use for the server. The server will be created using resources from that location. By default, you can use the resources from your own account by selecting "Account Resources". You can view the unused (and therefore available) resources from your account at:
https://hosting.zampto.net/resources
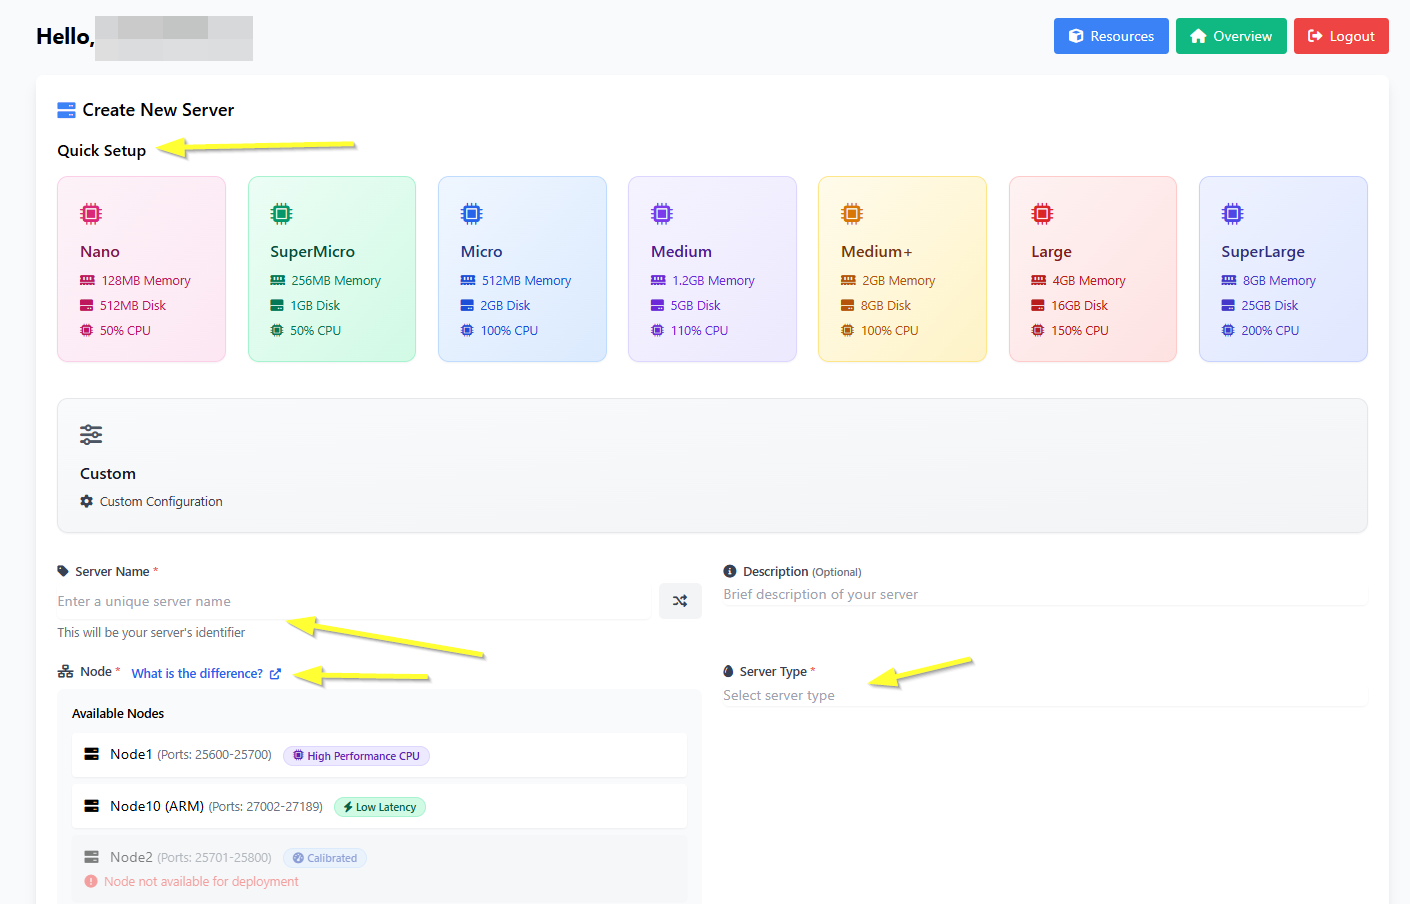
- Now you can proceed to configure the basic settings of your server:
1. Configure the resources to allocate to your server – this includes Memory (RAM), Disk Space, CPU, Backups, and Allocations (Network Ports).
You can use the Quick Setup option if you prefer, by selecting a predefined template, as long as the assigned resources are available in your account (Or Resource Pool if you selected one in the previous step and not your account resources).
Alternatively, you can manually choose (write) the exact amounts you prefer at the bottom of the page.
2. Set a name for your server.
The name can only contain Latin letters (A–Z, a–z), numbers (0–9), and spaces.
3. Choose the Server Type.
This defines what kind of server you're creating. For example:
-
If you want to host a Minecraft Paper server, choose Minecraft Paper.
-
For JavaScript-based apps (Example: Discord Bots), select NodeJS.
-
For Python-based apps (Example: Discord Bots), select Python.
-
For a website using PHP, HTML, CSS, JS, and more, select WebHost (egg).
...and so on, depending on what you want to run, build and host.
4. Select the Node.
Each node is a different physical or virtual machine (a sort of dedicated computer) located in various locations.
You can find more information about each node at zampto.net/nodes.
Choose the node where your server will be hosted — note that you won't be able to change it later. Each node has different features and specifications.
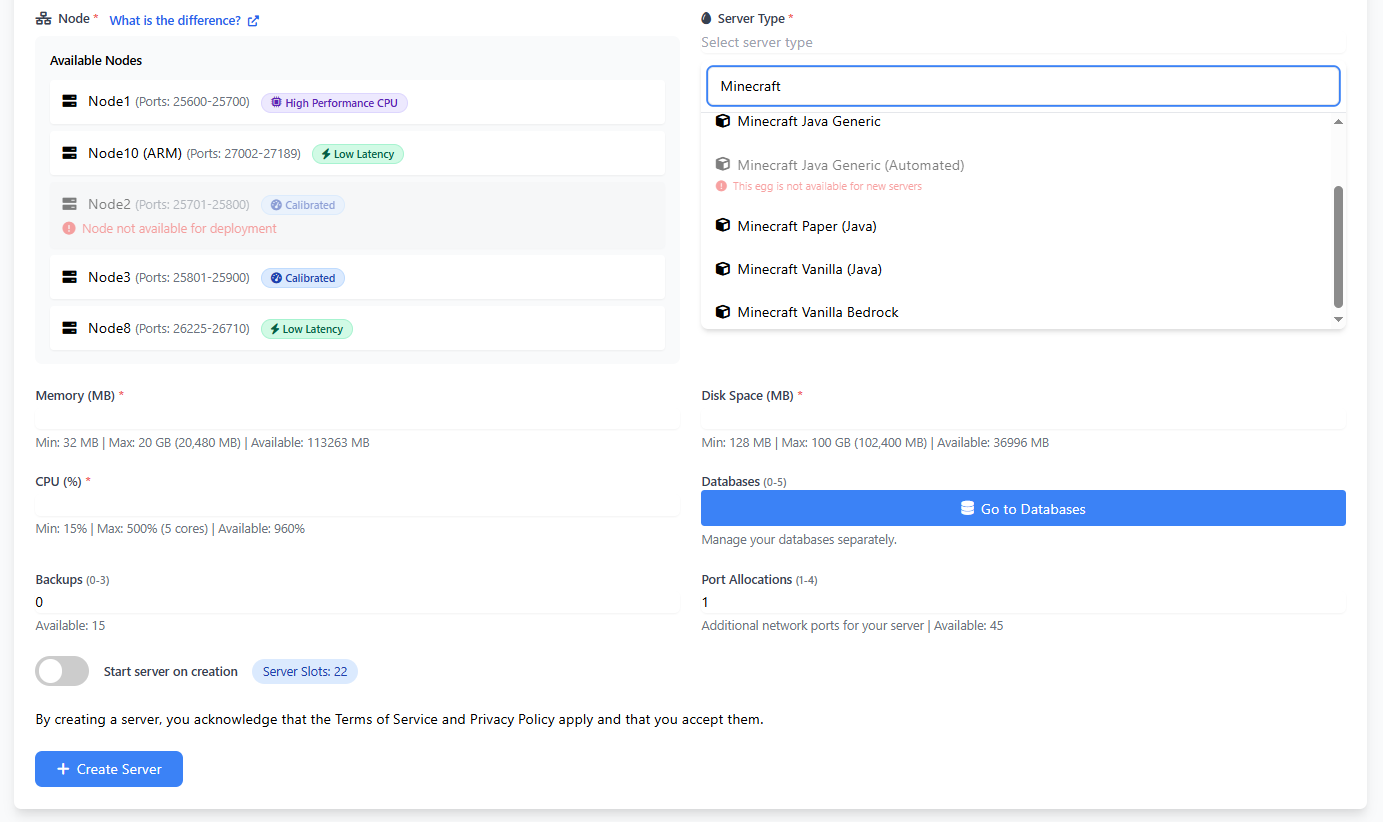
For Memory, Disk, CPU, and other values related to the amount of resources, if you have selected a Quick Setup Template, the values will be filled in automatically. You can always modify them now or later.
Then simply click "Create Server" button to create your server!
- After clicking "Create", your server will be added to the queue. Once it's created, the page will automatically refresh.
You can safely close the page in the meantime if you want — the process is fully automated.
You'll be notified both via email and in the dashboard hosting.zampto.net as soon as your server is ready to use!
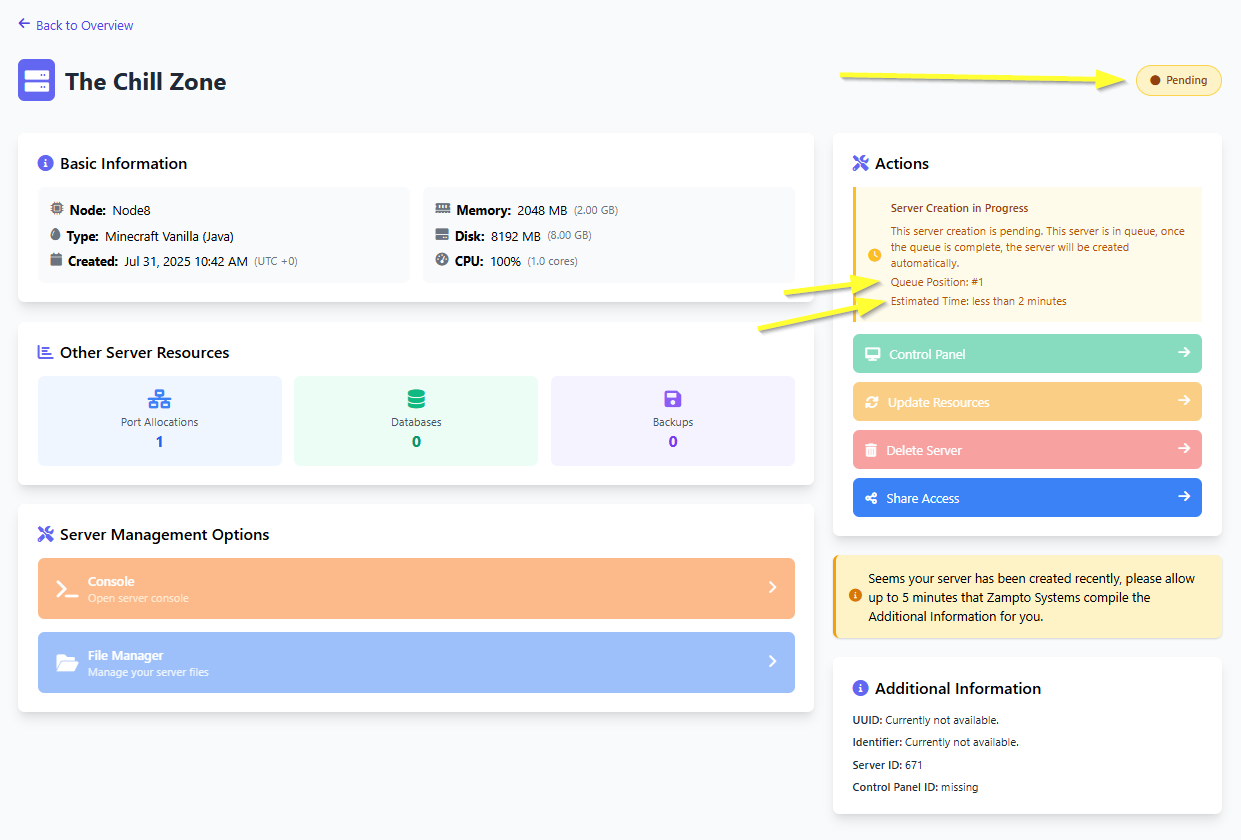
- Once your server has been created, we will automatically begin installing the server type you previously selected.
This is the final step before your server is ready to use. However, it may take a few extra minutes after the installation completes for everything to fully synchronize and become fully operational.
As soon as the installation is complete and your server is ready to use, you’ll receive an email, and the page will automatically refresh.
- Then your server is ready for use!
You can access the Console, File Manager, and other tools simply by clicking the Control Panel button.
