Resources Pools
Resource Pools are like secondary resources storage areas available on Zampto Hosting.
Example:
Your friend can create a Resource Pool, add 512MB of Memory to it, then add you as a user. You can also add additional resources, and both of you can use them to create, add, and manage server resources together!
Key Points:
-
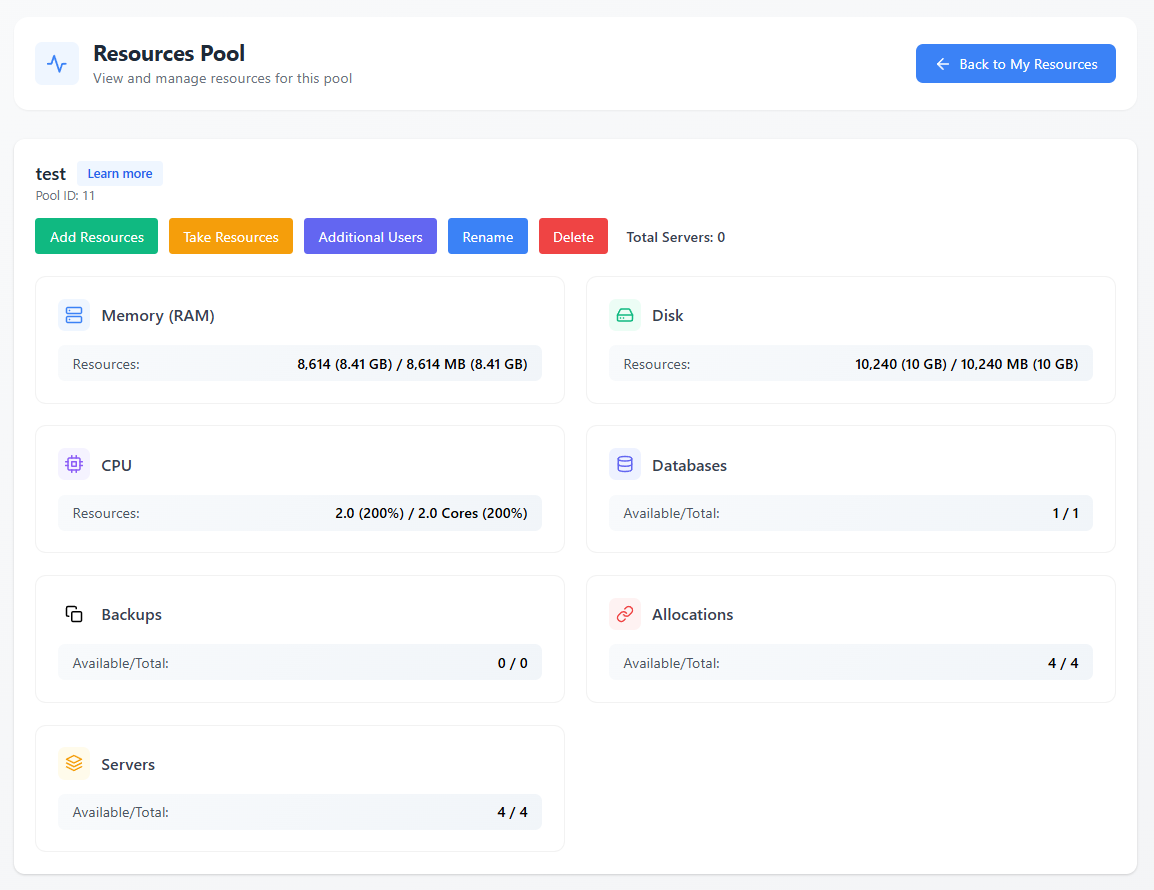
Each pool has its own admin, usually the pool creator.
-
The admin can perform exclusive actions like Delete, Rename, and Add Users to the pool.
-
Every user can take and add resources to the pool, view all changes and use the resources in the pool to create, update and manage servers.
In Premium Plans:
In premium plans, additional resources are provided through dedicated premium pools. These pools function like normal ones but with some restrictions:
-
The admin can only rename the pool.
-
The admin cannot remove or add users, nor delete the pool, as these are managed by the purchased plan linked to the pool admin user.
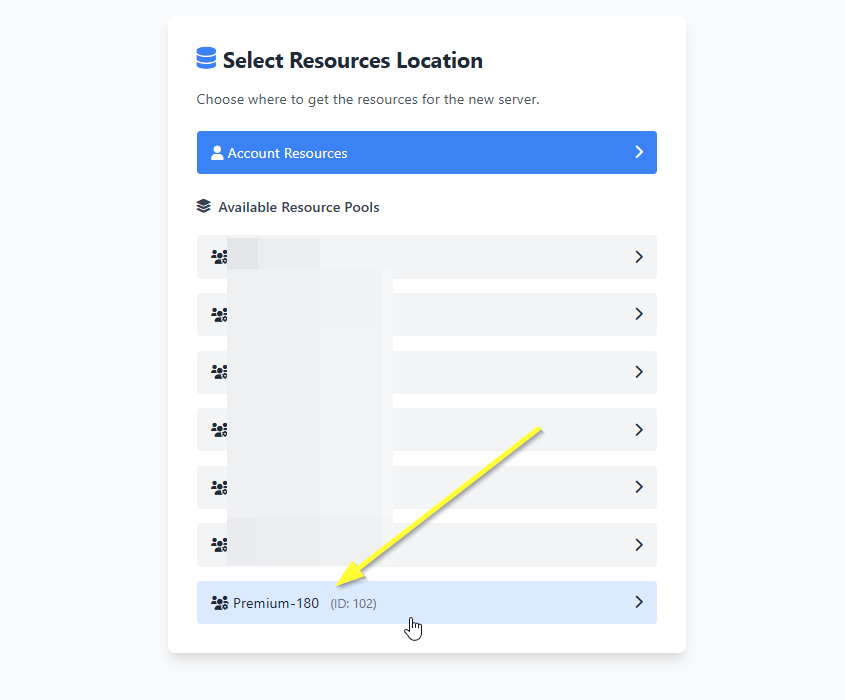
Creating a Server Using a Resources Pool
To create a server with the resources of a specific pool:
-
Click the Create Server button.
-
When asked to choose the resource location during setup, select the Pool you want to use.
-
Create the server as you normally would; the procedure is identical, the only difference being that you are limited and therefore use the resources of the pool you have selected.
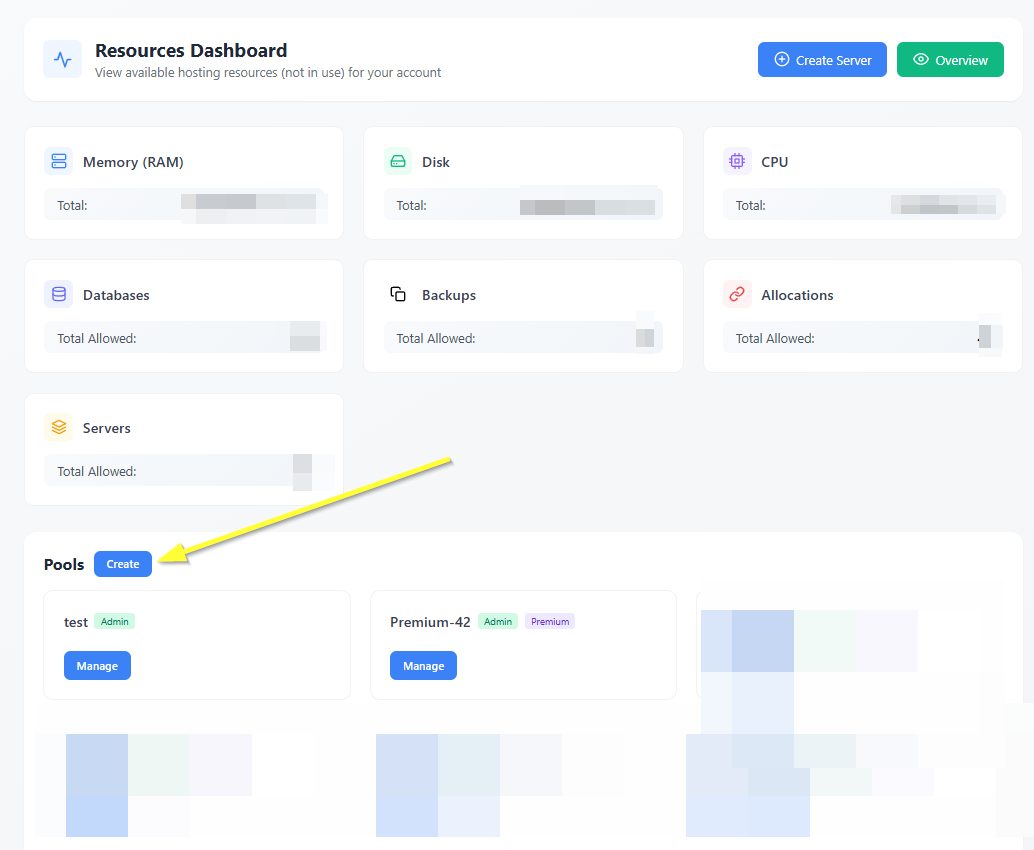
Creating a Resources Pool
To create a Resource Pool:
-
At the bottom, you’ll find a “Pools” section with a Create button.
-
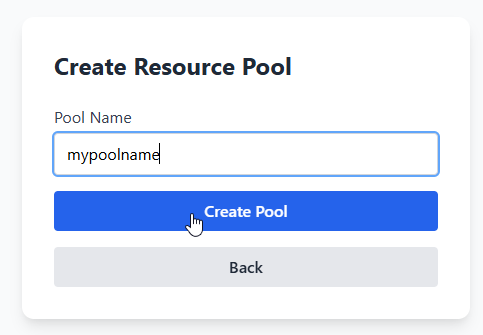
Click Create, then on the next page, enter the Pool name and click Create again.
Viewing Total and Available (Unused) Resources
Next to each resource, you’ll see the following format:
[AVAILABLE (NOT IN USE, i.e., NOT ASSIGNED TO ANY SERVER)] / [TOTAL, INCLUDING ASSIGNED]Example: Memory (RAM)
768 MB (0.75 GB) / 1,024 MB (1 GB)This means you have 768 MB of Memory available to use, out of a total of 1,024 MB.