How to Set Up a Domain and Host a Wordpress Website on Zampto Hosting
You can host any website on Zampto, such as a WordPress site, which we will use as an example in this guide.
Youtube Video Tutorial:
1. Log in to Zampto Hosting
Go to dash.zampto.net and log in.
2. Create a Server
-
Click Create Server and select the resource location.
-
Create the server as usual, but for speed and security, it is recommended to use a node that includes a MariaDB server. You can find info on zampto.net/nodes.
Examples: Node8, Node10
-
Set Server Type to WebHost Nginx.

-
Configure memory (RAM), disk, CPU, etc., or use a template.
-
For small WordPress sites, typically:
-
Disk: 5–10 GB
-
RAM: 512 MB–1024 MB
-
-
For additional resources, Zampto offers premium plans: zampto.net/pricing
-
3. Prepare WordPress
-
After the server is created and the Docker image is installed, download the latest WordPress version from wordpress.org/download.
-
Open the Web File Manager on your server and upload the ZIP file.
-
Once uploaded, right-click the file and select Decompress.
-
If a new folder is created (e.g.,
wordpress), rename it towebroot(delete the existingwebrootfolder if it exists). -
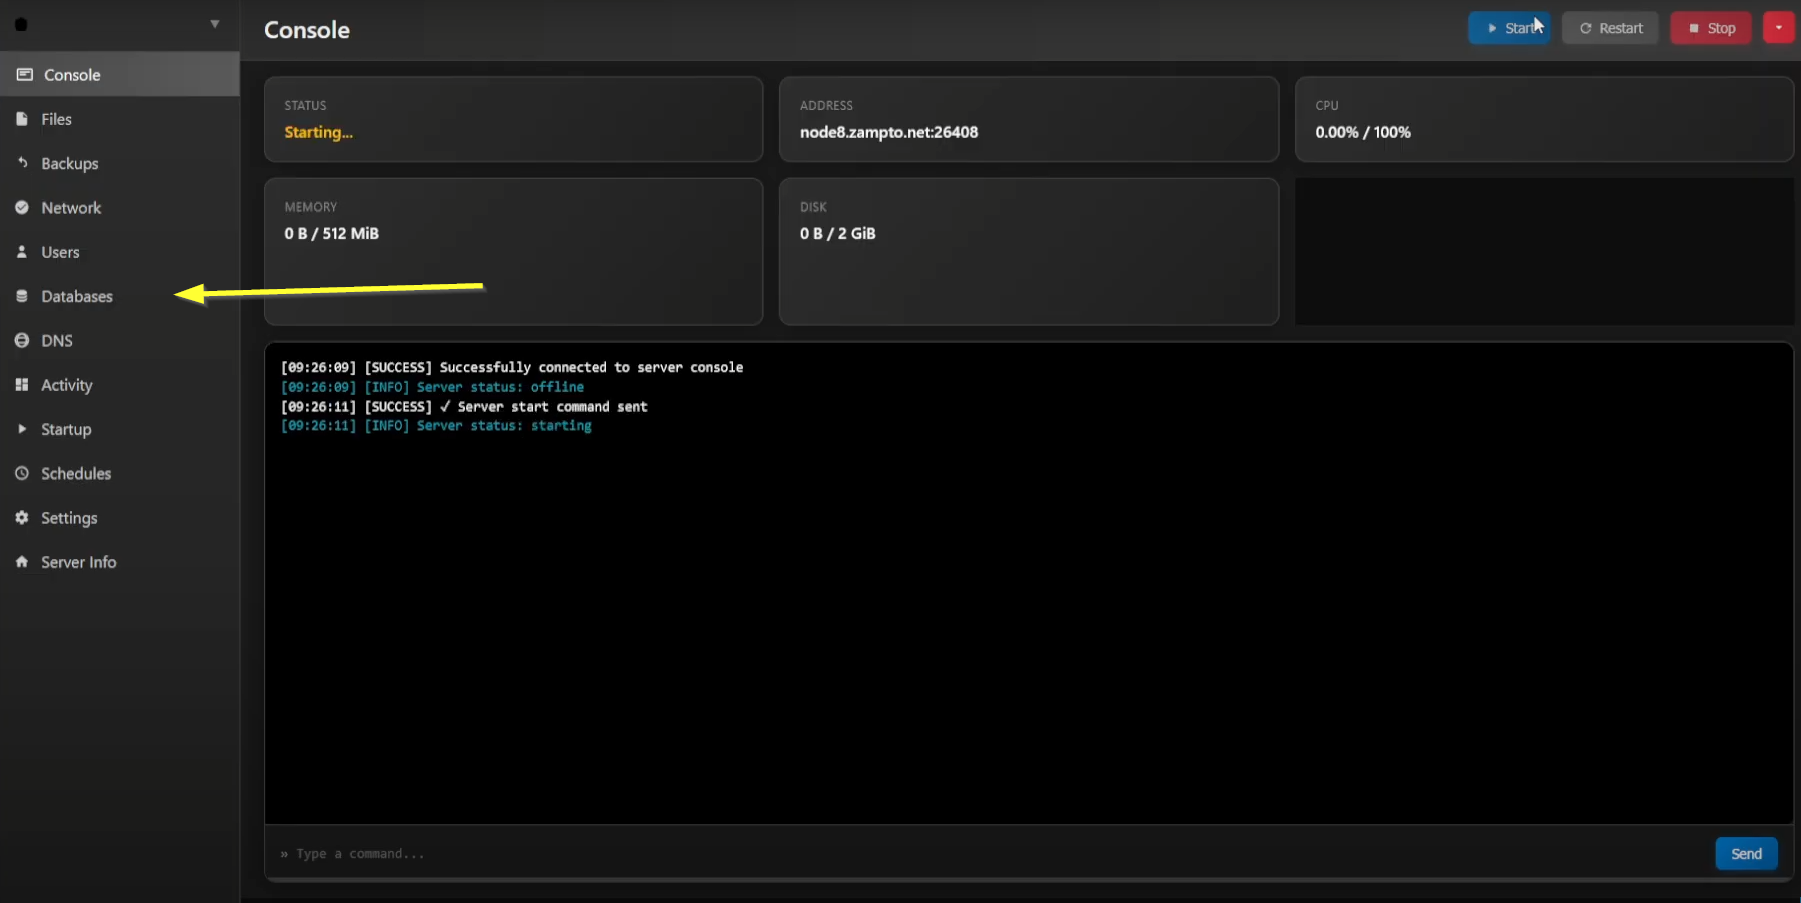
Start or restart the server from the console using the START button.
4. Set Up a Database (if required)
WordPress requires a database.
- Open the Database Management section from the console sidebar.
-
Select the Database Host (MariaDB server) corresponding to your node (e.g., Node8 → MariaDB-1).
-
Create a new database:
-
Name: your choice
-
Maximum size: if needed, increase for databases > 256 MB
-
Allowed Connection IP: default
All -
Enforce SSL: disabled (unless you know what you’re doing)
-
Credentials: Auto Generate
-
-
Click Create Database and save the credentials in a text file.
5. Configure a Custom Domain (Optional)
Skip this section if you prefer to use the default
http://[node].zampto.net:[port].
-
Ensure your domain is connected to Cloudflare and using Cloudflare nameservers.
-
Log in to Cloudflare and select your domain.
-
Go to SSL/TLS and set the encryption mode to Full or another compatible mode (For example, Flexible, Full (Strict) or Strict (SSL-Only Origin Pull), varies on a case-by-case basis)
-
Exit the domain view: click your account name at the top. This is necessary because some sidebar options, like Zero Trust, are only visible in the main account view.
-
Open Zero Trust from the sidebar. Activate the free plan if not already done.
-
Navigate to Networks → Tunnels → Create a Tunnel.
-
Set tunnel Type:
CLOUDFLARED -
Name your tunnel
-
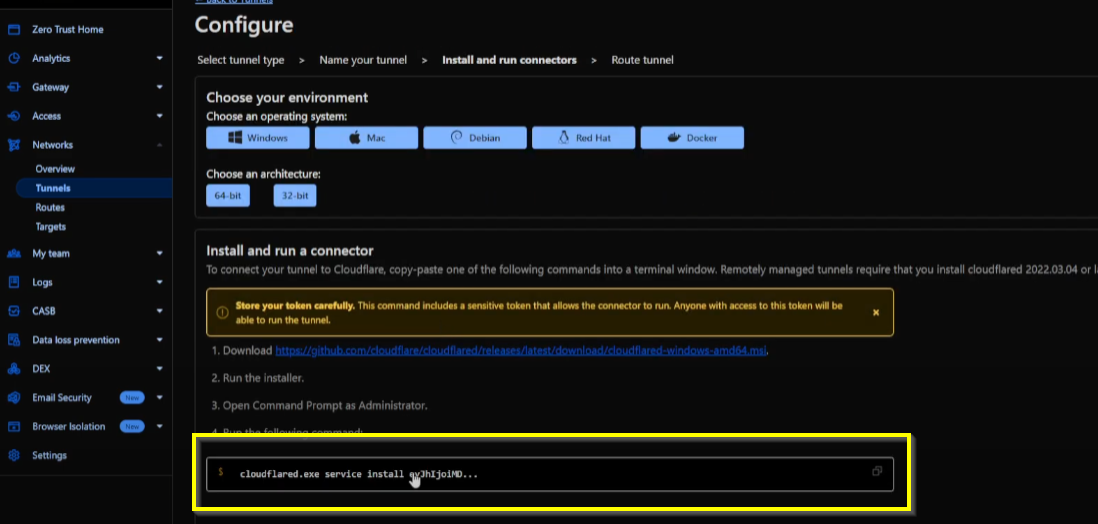
Copy the token provided (the long random string after
service install)
-
-
In Zampto Console, open STARTUP and:
-
Set Cloudflare Tunnel Token to your token
-
Set Cloudflare Tunnel Mode:
-
ENABLEDfor general domain access -
Enabled with full routing(recommended) to restrict access to your domain only
-
-
-
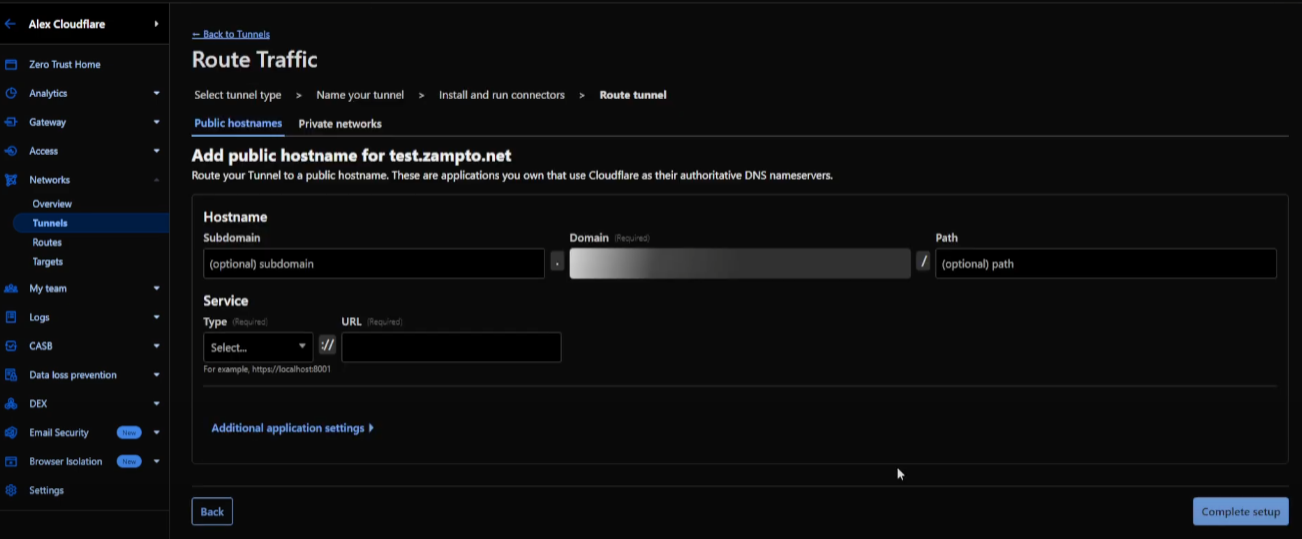
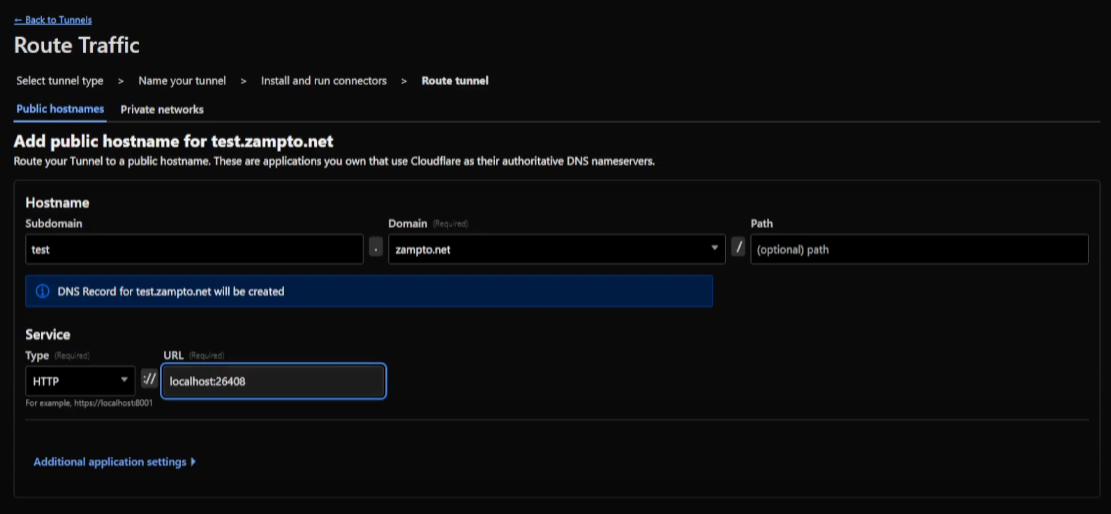
Back in Cloudflare, configure your tunnel:
- Domain: your domain/subdomain (e.g.,
test.zampto.net)
- Domain: your domain/subdomain (e.g.,
-
Service:
-
Type:
HTTP -
URL:
localhost:[server port](e.g.,localhost:15501)
-
- Restart your server. Your site should now be accessible via your custom domain.
6. Complete WordPress Setup
-
Visit your domain or subdomain. The WordPress setup page should appear.
-
Enter database details:
-
Database Host: usually
172.18.0.1 -
Username, Password, Database Name: use the credentials saved earlier
-
Database prefix:
[userid]_[database_name](provided automatically)
-
-
Click Run Installation.
-
Fill in your site information (site name, admin account, etc.).
7. Done!
Congratulations! Your WordPress website is now live. Log in and manage it like any other website.
Common WordPress Errors on Zampto Hosting
One of the most common mistakes is leaving the homepage on http:// instead of https://.
This can cause issues such as:
-
Errors when updating or creating posts
-
Plugin malfunctions
How to Fix It
-
Log in to your WordPress Admin (WP Admin).
-
From the sidebar, go to Settings → General.
-
Look for Site Address (URL).
-
If it is set to
http://, change it tohttps://.
Example:
http://test.zampto.net➡️
https://test.zampto.net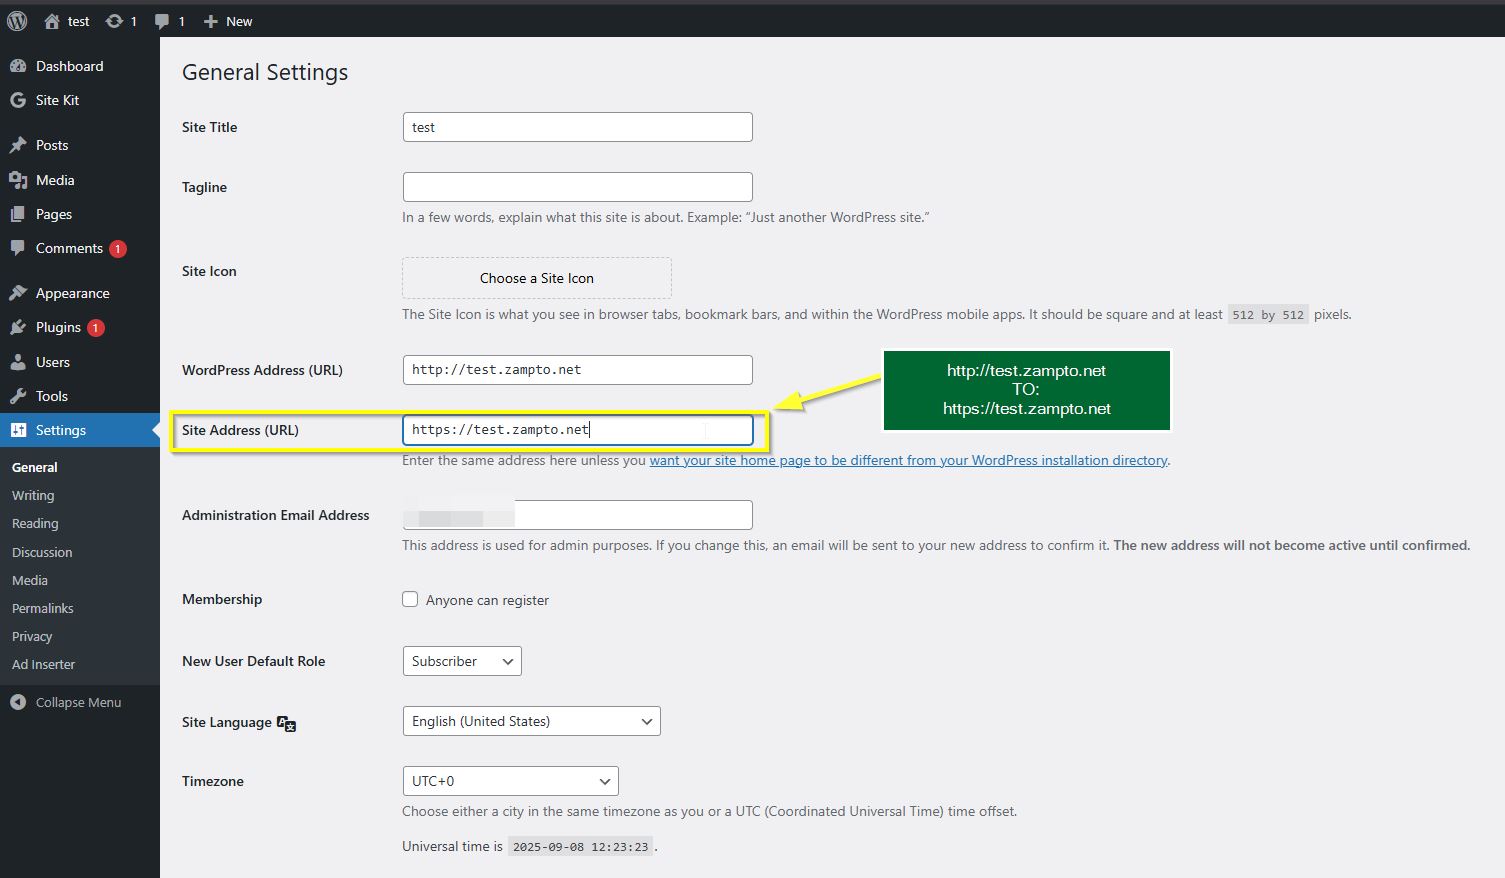
Still having trouble? 👉 Contact us at zampto.net/contacts